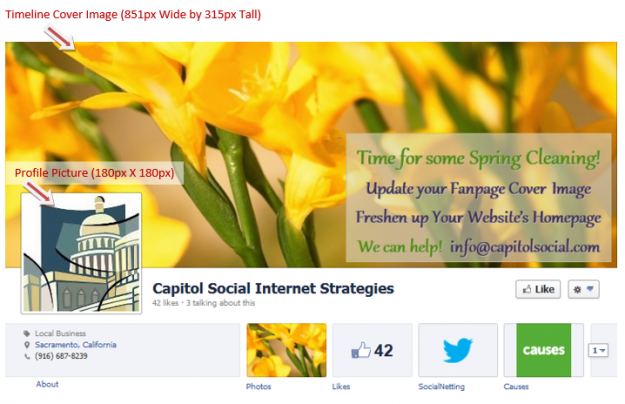
Your Timeline Cover image is now an important part of your Facebook marketing strategy – and, if you use Facebook to simply communicate with friends, your Cover image is a way to display the latest important event in your life.
Do you know the rules about your Facebook Timeline Cover image? Do you even have one? Do you change it on a regular basis?
Facebook’s Timeline Cover Basics:
Click on your name to get to your Timeline where you see your posts, Likes, Friends/Fans and photos.
Your Timeline should include your Profile Picture (Size: 180 pixels X 180 pixels – Facebook will shrink it to 160 X 160); and a Cover image behind the Profile Picture that runs horizontal (Size: 851 pixels wide X 315 pixels tall). Prepare the image with the text overlay in Word, then make a screen shot and crop it to the 851 X 315 size. Save in a jpg or png format. If you don’t create the picture using the proper dimensions, Facebook will stretch the image you upload, and it will look fuzzy.
Why does it matter? Every time you change your Cover image or Profile Picture, your friends/fans will be notified – so make it count! It is also the first thing people see when they visit your Fanpage or Personal Timeline.
Facebook restricted the content of your Cover image in the past – they did not want it to look too commercial. Recently, they relaxed the rules so you can add a text overlay to the image including a Call to Action (e.g. Visit my website to receive a discount coupon..) and contact info such as a website or email address. It’s also OK to include pricing and product information, however, your image must have no more than 20% text.
View a sample Timeline Cover Image and Profile Picture below.
Be sure to change out your Cover image often to keep your friends and fans updated on your latest products or activities. If you need help creating the image, or just want some ideas – contact Betsy at CapitolSocial.
This is the kind of Spring Cleaning we like to do!


